How to Apply Thermal Paste Like You Actually Know What You're Doing
Thermal paste application isn't rocket science, despite what some forum warriors want you to believe. I've seen people spend hours debating dot patterns like they're performing brain surgery. Here's the truth: if your CPU isn't thermal throttling and your temps are reasonable, you did it right.
That said, there's definitely a wrong way to do it. I learned this the hard way when I built my first PC and basically frosted my CPU like a birthday cake. Spoiler alert: more isn't better.
What Actually Matters
The goal is simple: fill the microscopic gaps between your CPU and cooler without creating an insulating layer. Think of it like spreading butter on toast - you want coverage, not a thick layer that prevents the heat from transferring.
Your CPU generates heat. Your cooler removes heat. Thermal paste helps that transfer happen efficiently. That's it.
The Method That Actually Works
Forget the internet debates about dots, lines, and X patterns. Here's what I do every time:
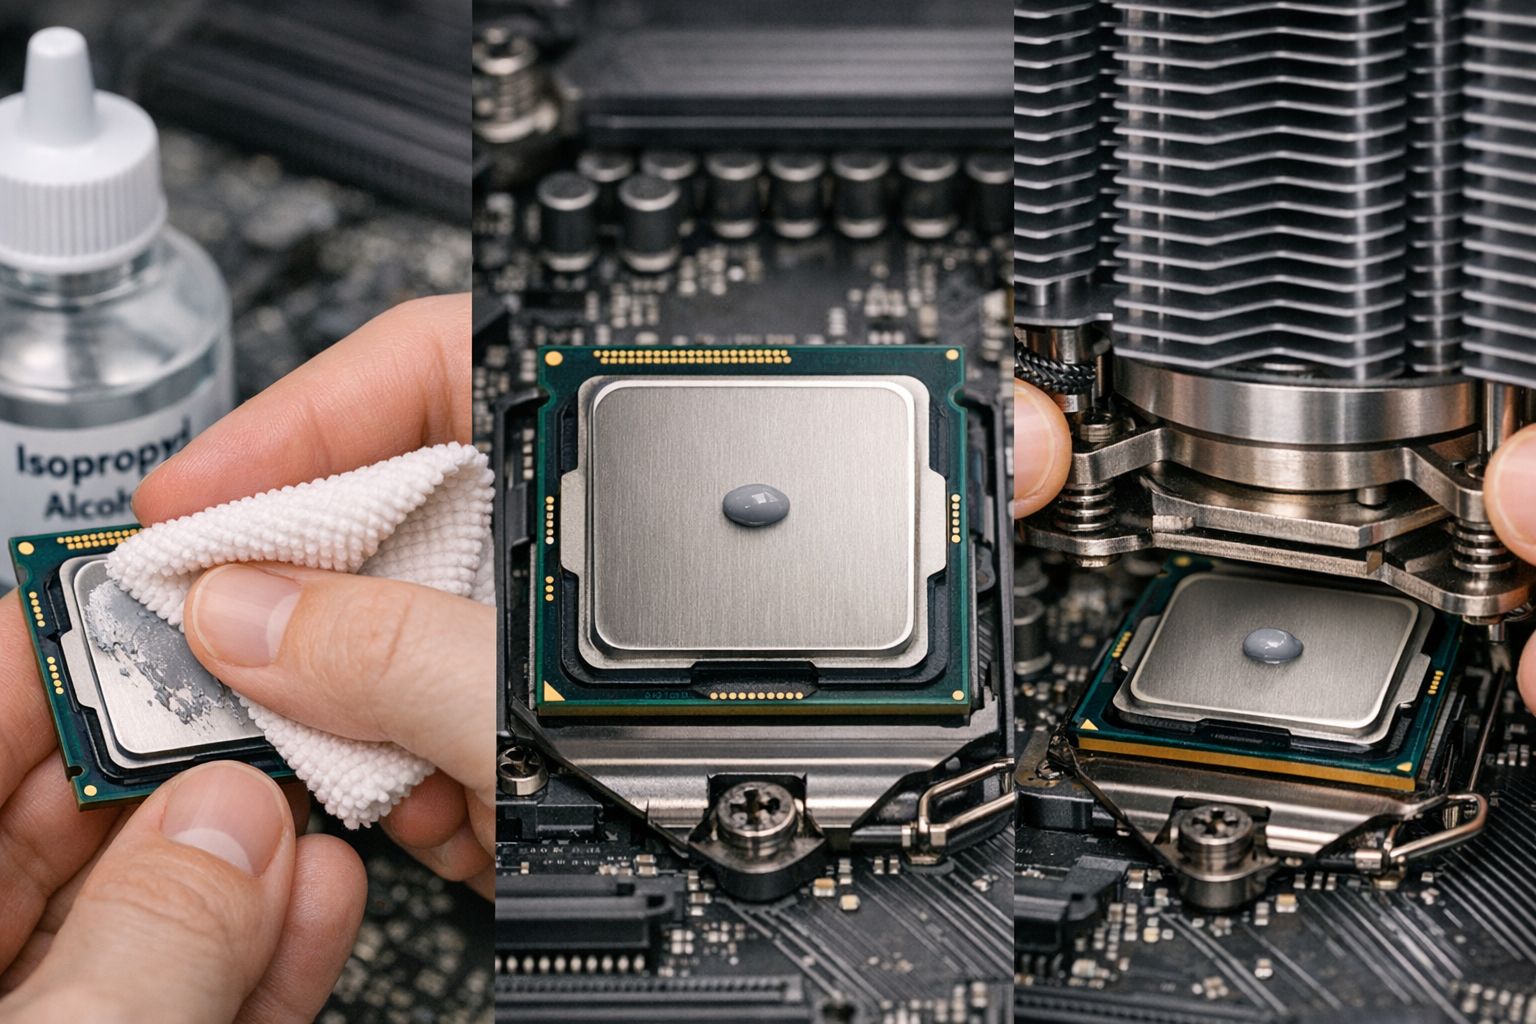
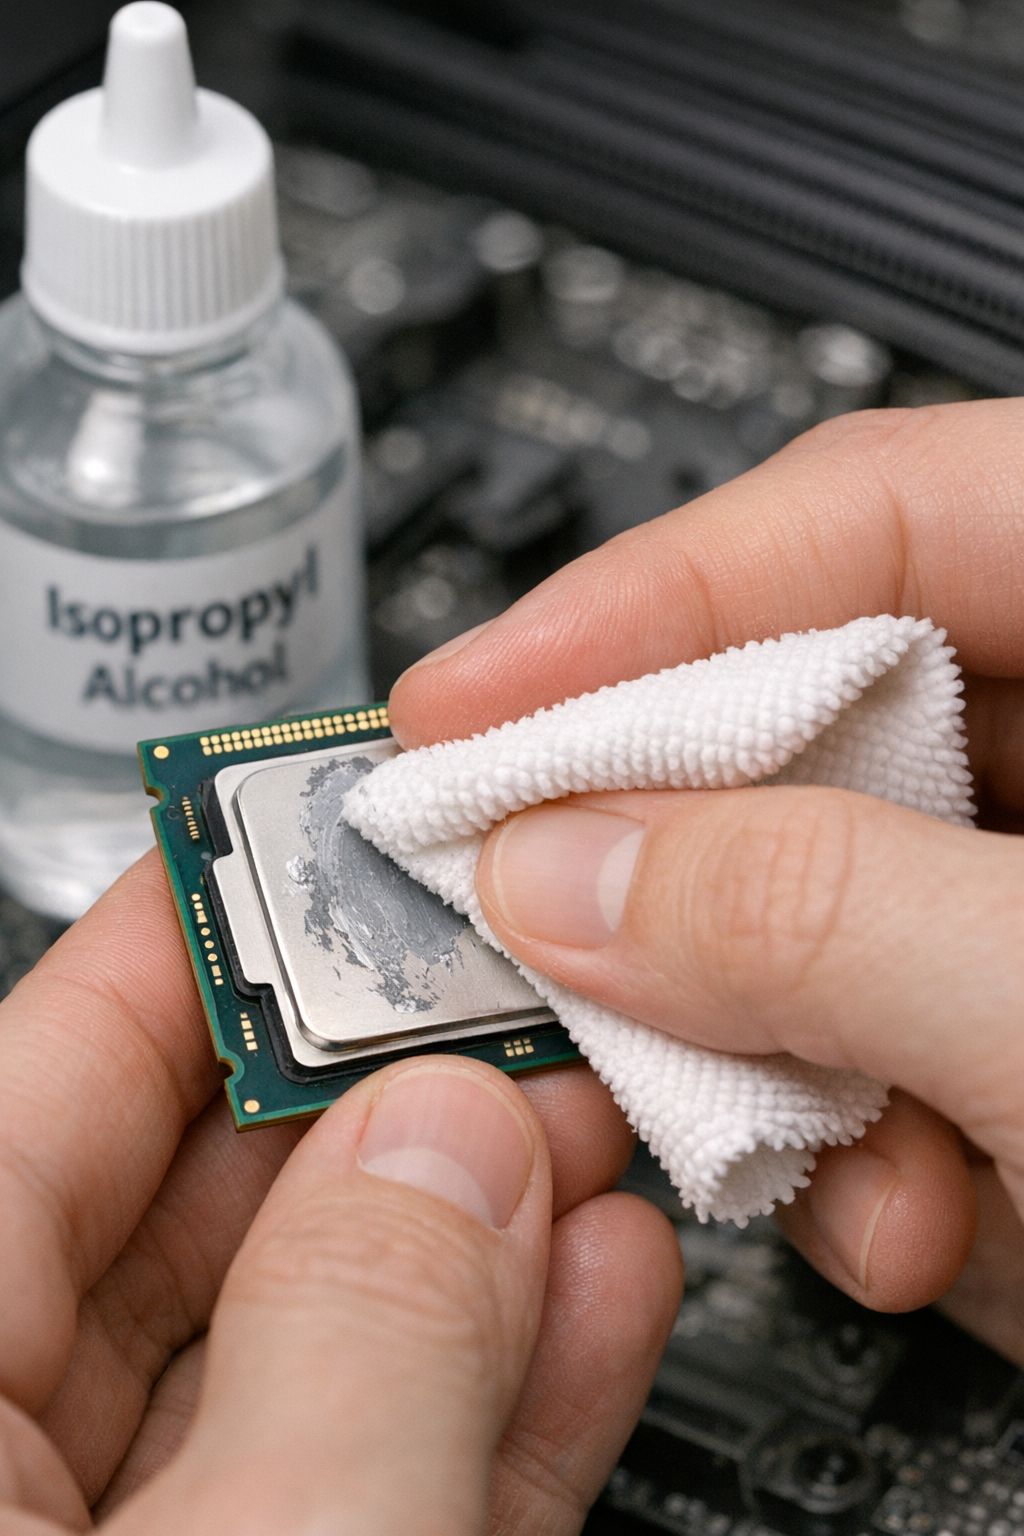
1. Clean Everything First Use isopropyl alcohol (70% or higher) and a lint-free cloth. Remove ALL the old paste from both the CPU and cooler. This step matters more than whatever pattern you choose next.
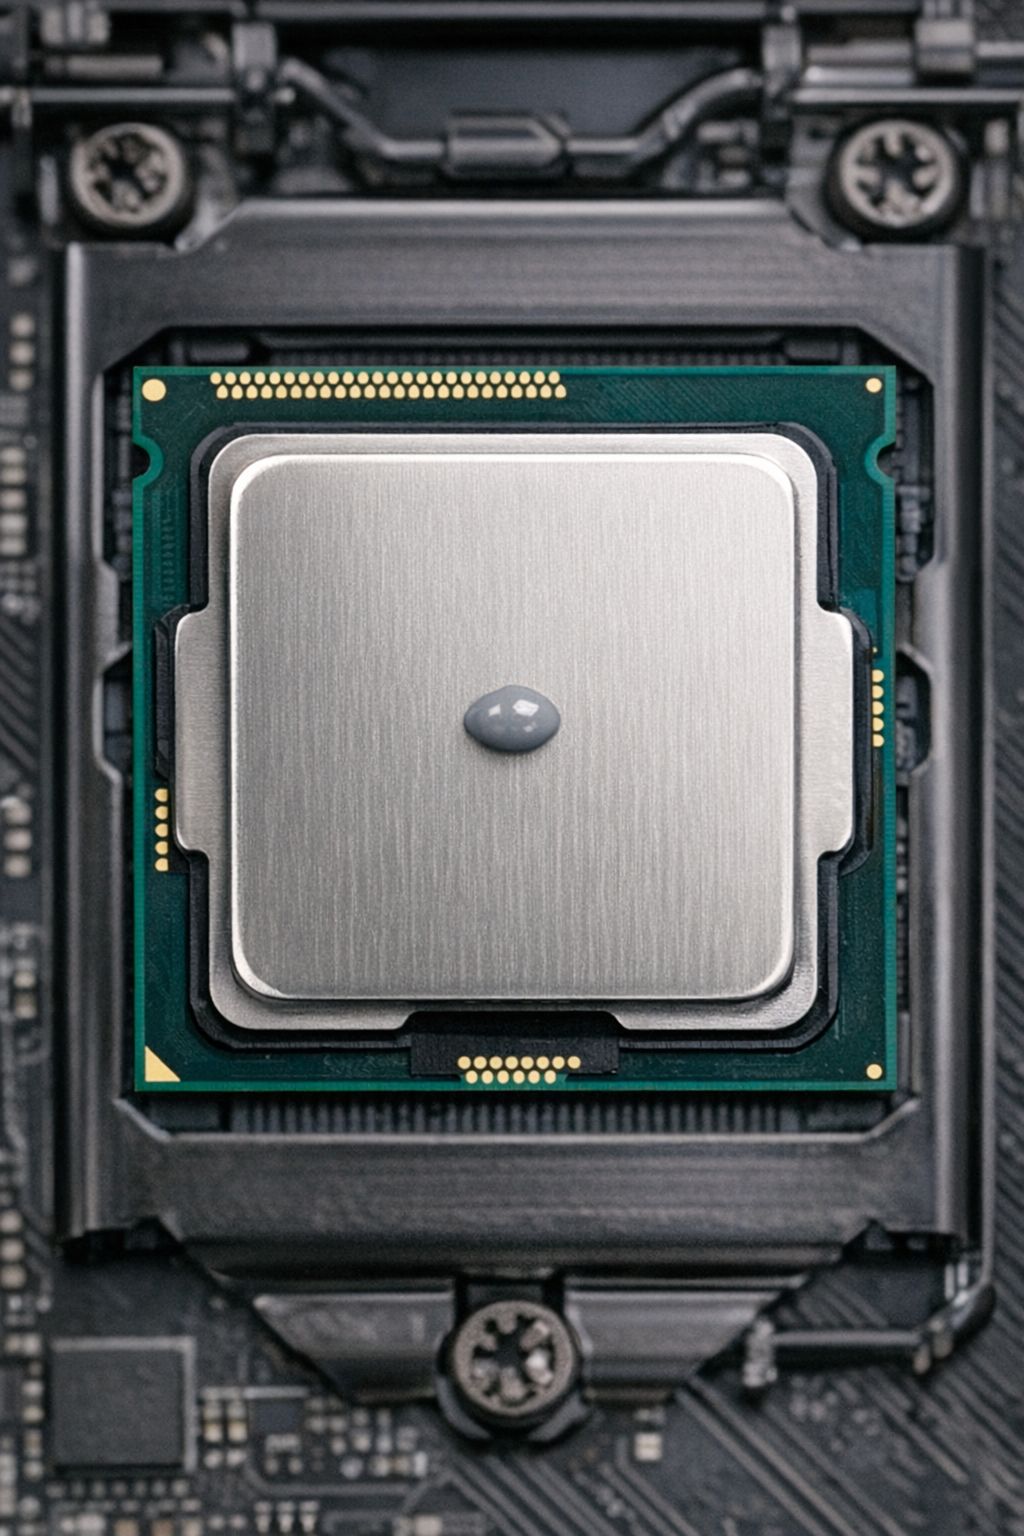
2. The Rice Grain Method Put a small amount in the center of the CPU - about the size of a grain of rice. Not a pea, not a line, not an X. Just a small dot in the middle.
3. Let the Cooler Do the Work When you mount the cooler, the pressure spreads the paste evenly. Don't pre-spread it with a card or your finger. The mounting pressure does this better than you can.
4. Check Your Work (Optional) If you're curious, remove the cooler after mounting to see the spread pattern. It should cover most of the CPU surface without overflowing onto the motherboard.
Common Mistakes I've Seen
Too Much Paste: More doesn't mean better cooling. Excess paste can actually insulate and make temps worse. Plus it might leak onto your motherboard.
Not Cleaning Properly: Old paste mixed with new paste creates an inconsistent layer. Always start with a clean surface.
Overtightening the Cooler: Finger-tight plus a quarter turn is usually enough. You're not trying to crush the CPU.
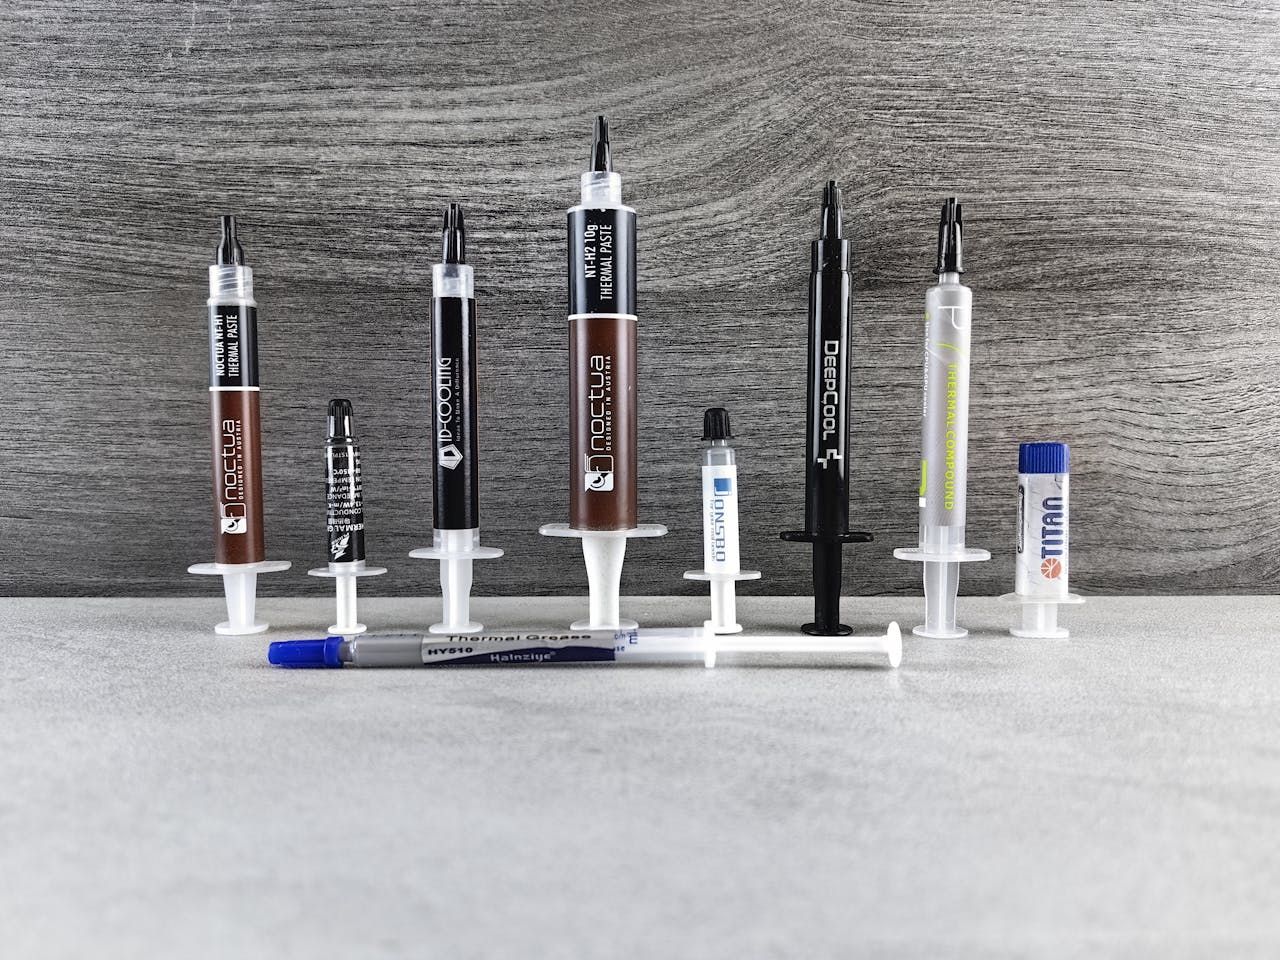
Which Paste to Buy
Honestly, most modern thermal pastes perform within a few degrees of each other. Arctic MX-4, Thermal Grizzly Kryonaut, or Noctua NT-H1 are all solid choices. The application method matters more than the brand.
Don't buy the cheapest no-name stuff, but you also don't need to spend $20 on "liquid metal" unless you're doing extreme overclocking. The stock paste that comes with most coolers is perfectly fine for most builds.
When to Reapply
Thermal paste doesn't expire overnight, but it does dry out over time. I typically reapply every 3-4 years or whenever I remove the cooler for any reason. If your temps suddenly spike without explanation, old paste might be the culprit.

The Bottom Line
Stop overthinking thermal paste. Clean surfaces, small amount in the center, mount your cooler properly, check your temps. If your CPU stays under 80°C under load, you did it right.
The difference between a "perfect" application and a "good enough" application is maybe 2-3 degrees. Your time is better spent on case airflow or making sure your cooler is actually adequate for your CPU.
Building a new PC and want to make sure all your components work together? Try RigSync's compatibility checker - it'll save you more headaches than perfect thermal paste application ever will.
Need help choosing the right cooler for your CPU? Check out our component browser for recommendations based on your specific build requirements.
Comments (0)
No comments yet. Be the first to share your thoughts!